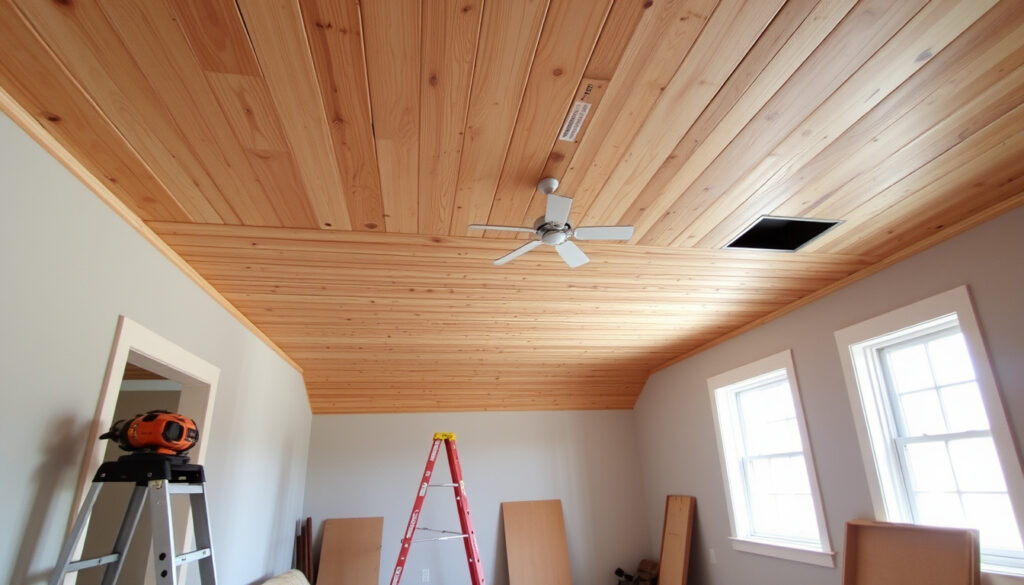
Tongue and Groove Ceiling: Cost & Installation Guide
A tongue-and-groove ceiling can turn a plain room into something that feels finished, intentional — even a little bit cabin-like. But before you pick up a nail gun, the real question is whether the cost and effort pay off. According to DG Floors (a U.S. flooring retailer), a pine T&G ceiling runs about $2.10 to $5.50 per square foot if you install it yourself. We’ll break down material prices, the wood-versus-PVC trade-off, and the techniques that separate a smooth job from a frustrating weekend project.
Typical board thickness: 1/2 inch to 1 inch (12–25 mm) for ceilings ·
Material cost per sq. ft.: $2.50 to $8.00 for wood; $1.50 to $4.00 for PVC ·
Installation method: Blind nailing through the tongue or adhesive ·
Common wood species: Pine, cedar, red deal ·
DIY friendliness: High, due to interlocking tongue-and-groove edges
Quick snapshot
- Solid pine (most common) (Angi)
- Cedar (moisture-resistant) (DG Floors)
- PVC (waterproof, lightweight) (Plank and Pillow)
- Red deal (budget option) — common in Ireland (Panel Company Ireland)
- Always install perpendicular to ceiling joists (Livinator)
- Use a pneumatic nailer for blind nailing (Home Like You Mean It)
- Acclimate wood in the room for 48 hours (DG Floors)
- Pros: Warm look, durable, DIY-friendly, hides wires (Plank and Pillow)
- Cons: High cost, moisture sensitivity, weight (Angi)
Here are the essential numbers to start with.
| Attribute | Value |
|---|---|
| Most common thickness | 5/8 inch (16 mm) for wood ceilings (DG Floors) |
| Cost rank vs. alternatives | More expensive than drop ceiling, less than reclaimed wood (HomeGuide) |
| DIY installation time (200 sq ft) | 8–12 hours for an experienced handyperson (Livinator) |
| Primary wood source in Ireland | Red deal (pine) from builders’ merchants (Panel Company Ireland) |
The pattern is clear: material choice and labor method drive the final bill more than room size.
Is a tongue and groove ceiling expensive?
Depending on the material and who does the work, a tongue-and-groove ceiling can cost anywhere from a few hundred dollars to several thousand. The numbers are wide because the choice of wood species, panel thickness, and labor rate all add up.
Material cost factors
- Pine boards: $1.50 to $4.00 per square foot (DG Floors (flooring retailer))
- Cedar boards: $3.00 to $7.00 per square foot (DG Floors)
- PVC panels: $1.50 to $4.00 per square foot (Plank and Pillow (home improvement site))
- Furring strips (if needed): $0.25 to $0.50 per square foot (DG Floors)
- Fasteners and finish: $0.35 to $1.00 per square foot (DG Floors)
DIY vs. professional installation cost
For a 200-square-foot ceiling, DG Floors calculates a DIY pine project at $420 to $1,100 and a professional install at $1,020 to $2,300. HomeGuide (cost data platform) puts the full installed range at $4 to $10 per square foot, or $400 to $2,000 for 100 to 200 square feet.
If you DIY a 200 sq ft pine ceiling, you’ll spend roughly $500–$1,100 on materials. Hire a pro and that number doubles. The biggest variable is the wood species, not the install method.
Cost comparison to other ceiling types
Compared to a drop ceiling ($2–$5 per sq ft installed) or a basic drywall ceiling ($2–$4 per sq ft), a tongue-and-groove ceiling is a premium choice. But it’s still cheaper than reclaimed wood paneling, which can run $10–$20 per sq ft.
The implication: the cost is real, but it’s not out of line for a feature ceiling that adds visible warmth to a room.
What are the disadvantages of tongue and groove?
Tongue-and-groove ceilings aren’t perfect. The three biggest headaches are moisture, noise, and weight.
Moisture and humidity risks
Solid wood expands and contracts with humidity. In a basement or bathroom without a proper vapor barrier, boards can warp, cup, or develop gaps over time. Angi (home services platform) notes that moisture is the top cause of callbacks in T&G installations. PVC panels avoid this problem, but they don’t offer the same natural look.
Acoustic limitations
A wood ceiling can make a room sound echoey, especially if the floor is tile or hardwood. Installing acoustic insulation in the cavity (for example, mineral wool) is recommended, but it adds to the cost and complexity.
Weight and structural load
Solid wood T&G panels are heavy. A 5/8-inch pine board weighs roughly 1.5 to 2 pounds per square foot. Over a 200 sq ft ceiling, that’s 300–400 pounds — well within a typical joist capacity, but something to check if you’re planning a wide span without support.
If you install T&G in a room that’s prone to moisture (like a bathroom or unheated porch), you’ll need a vapor barrier and a sealed finish — or switch to PVC. The wood version is not a set-and-forget material.
The trade-off: you get a beautiful, warm ceiling, but you have to manage moisture and acoustics from the start.
Tongue and groove vs shiplap: which is better for a ceiling?
One three-item comparison, one key difference: how the boards meet.
| Feature | Tongue and Groove | Shiplap |
|---|---|---|
| Interlocking mechanism | Protruding tongue fits into a recessed groove — flush joint | Rabbeted edge creates a slight overlapping gap |
| Visible gap | No gap; boards sit flush | Small shadow line between boards (intentional aesthetic) |
| Standard fastening | Blind nailing through the tongue — no visible nail heads | Often face-nailed, so nail heads are visible on the surface |
| Cost per linear foot (material) | $2.50–$4.00 for pine | $2.00–$3.50 for pine |
| DIY difficulty | Moderate — requires blind nailing technique | Easy — face nailing is straightforward |
| Aesthetic profile | Clean, seamless, modern-rustic | Rustic, farmhouse, with visible horizontal lines |
Home Like You Mean It (DIY blog) points out that shiplap’s exposed gap can hide minor errors in alignment, while T&G’s flush fit demands more precision. The catch: if you want a smooth ceiling without visible fasteners, T&G is the better choice — but it takes more care to install.
How to install a tongue and groove ceiling: a step-by-step guide
Before you start, gather the tools: a pneumatic nailer (or hammer and nail set), measuring tape, level, circular saw or miter saw, safety glasses, and a ladder. For a 200 sq ft ceiling, budget 8–12 hours if you’re experienced, longer if it’s your first time.
- Step 1: Measure and mark ceiling joists. Locate the ceiling joists with a stud finder and mark their centers. The boards will be installed perpendicular to the joists. If the joists are not perfectly straight, you may need furring strips to create a level surface.
- Step 2: Install furring strips if needed. If the ceiling is uneven, screw furring strips (1×3 or 1×4) across the joists at 16-inch centers. This provides a flat nailing surface and allows you to add insulation if desired.
- Step 3: Acclimate the wood. Bring the T&G panels into the room and let them sit for at least 48 hours. This allows the wood to adjust to the room’s humidity, reducing the risk of warping after installation.
- Step 4: Blind nailing technique. Position the first board with the tongue facing away from the wall, leaving a 1/4-inch gap for expansion. Nail through the tongue at a 45-degree angle into the joist or furring strip. Use a pneumatic nailer with 1.5-inch brads or finish nails. The next board’s groove will cover the nail heads.
- Step 5: Stagger board joints for strength. When you need to join two boards end-to-end, cut the ends square and stagger the joints across different joists — never line up joints on the same joist. This prevents weak seams.
- Step 6: Tape, fill, and finish. After all boards are installed, fill nail holes (if any) with wood filler, sand lightly, and apply your chosen finish — paint, stain, or clear sealant. For bathrooms or kitchens, use a moisture-resistant paint or polyurethane.
What thickness tongue and groove is best for a ceiling?
Three common thicknesses, one rule of thumb: thicker boards span wider gaps without sagging.
| Thickness | Common applications | Max joist spacing | Weight per sq ft |
|---|---|---|---|
| 1/2 inch (12 mm) | PVC panels, lightweight ceilings | 16 inches | ~0.8 lb (PVC) |
| 5/8 inch (16 mm) | Most wood ceilings — standard choice | 16 inches | ~1.5–2.0 lb |
| 1 inch (25 mm) | Wide spans, exposed beam look, heavy duty | 24 inches | ~2.5–3.0 lb |
DG Floors recommends 5/8 inch (16 mm) as the minimum for wood ceilings on 16-inch centers. Thinner boards can sag over time, especially in warmer climates. The extra cost of 1-inch boards is worth it if you want a more substantial look or are spanning 24-inch joists.
The pattern: thicker is always better for structural integrity, but weight and cost increase accordingly. For most residential rooms, 5/8 inch hits the sweet spot.
Is a tongue and groove ceiling worth it?
Upsides
- Adds warmth and character — a room instantly feels finished
- Durable; solid wood can last 20+ years with proper care
- DIY-friendly with interlocking edges and blind nailing
- Hides wires and ductwork if you run them in the cavity
- Can increase home resale value by 2–5% in some markets (Angi)
Downsides
- Higher cost than drywall or drop ceiling
- Susceptible to moisture damage in unconditioned spaces
- Heavy — adds structural load
- Requires a vapor barrier and acoustic insulation in some rooms
- Maintenance: may need repainting or resealing every 5–10 years
The best candidates for a tongue-and-groove ceiling are homeowners who value appearance over cost and are willing to put in a weekend of work. For renters or those on a tight budget, a painted ceiling or beadboard panels are cheaper alternatives.
What we know for sure — and what’s still unclear
Confirmed facts
- Tongue and groove boards interlock via a protruding tongue and recessed groove.
- Blind nailing is the standard installation method to hide fasteners.
- Wood tongue and groove ceilings require a vapor barrier in unconditioned spaces.
What’s unclear
- Long-term cost savings of PVC vs. wood over a 30-year period — data is limited.
- Average lifespan of a tongue and groove ceiling in a high-humidity temperate climate (e.g., Ireland).
“Tongue and groove cladding is easy fitting and ideal for DIY projects.”
“Our PVC panels are quick and easy to install, creating an attractive finish at a great price.”
For a DIYer in Ireland or the UK, the choice often comes down to pine (red deal) for that warm, natural look — or PVC for a moisture-proof, low-maintenance ceiling. The research is clear on installation method, but cloudy on long-term durability in damp climates. If you’re planning to sell in five years, the wood ceiling adds curb appeal. If you’re staying put, the PVC version might save you a repaint a decade from now.
Related reading: Reverse Osmosis System for Home: Cost, Downsides & Best Options · Drain Cleaning Companies Near Me: Costs, Causes & DIY Guide
homewyse.com, youtube.com, oneanddoneprep.com, sherwoodlumber.com, intdesigners.com, hisupplier.com
Frequently asked questions
How do you finish a tongue and groove ceiling?
You can paint, stain, or seal it. For a painted finish, use a primer and two coats of ceiling paint. For a natural look, apply a clear polyurethane or wax. In moisture-prone areas, use a semi-gloss or gloss paint that resists condensation.
Can tongue and groove ceiling be used in a bathroom?
Yes, but you must use a vapor barrier, seal all joints, and choose a moisture-resistant finish. PVC panels are a better option for bathrooms because they are completely waterproof.
What is the best way to clean tongue and groove ceiling panels?
Dust regularly with a soft brush or vacuum attachment. For wood panels, wipe with a slightly damp cloth and mild detergent — never soak the wood. PVC panels can be cleaned with a standard household cleaner.
How do you fix a squeaky tongue and groove ceiling?
Squeaks usually come from the boards rubbing against each other or against the joists. Drive an additional finish nail through the tongue into the joist, or apply a bead of construction adhesive between the board and the joist.
Is tongue and groove ceiling fire resistant?
Solid wood is combustible and offers no inherent fire resistance. PVC panels may produce toxic fumes when burned. Check local building codes; some jurisdictions require a fire-rated ceiling assembly in certain applications.
Can you paint tongue and groove ceiling panels?
Yes. If the panels are already installed and finished, sand lightly and apply a bonding primer before painting. Unfinished wood can be primed and painted directly.
How much does a tongue and groove ceiling add to home value?
According to Angi, a well-installed tongue-and-groove ceiling can increase resale value by 2–5% in markets where finished ceilings are expected. The return is highest in mid-range homes where the upgrade stands out.
For a homeowner in a temperate climate like Ireland, the decision is clear: if you want warmth and character and are willing to maintain it, go with wood. If you need a set-and-forget solution in a bathroom or porch, PVC is the pragmatic choice. Either way, the tongue-and-groove ceiling remains one of the most satisfying weekend projects that actually adds value to your home.
More related posts
 RN Jobs Near Me in Ireland: How to Find & Apply (Dublin, Galway)
 How to Fix a Zipper: Quick Fixes for Separated or Stuck
 What Is Internal Medicine – Internist Role, Training & Comparisons
 How to Change a Tire: Step-by-Step Guide with Safety Tips
 All Roads Lead to Rome: Meaning, Origin, and Modern Usage
 What Is a JPG vs PNG – Compression, Transparency and Best Uses
 Area of a Circle: Formula, How to Calculate & Examples
 A Court of Thorns and Roses Book Series Order: Complete Guide